How to build multiple counters using React and Redux
April 22, 2020 | 6 min read
I am going to show you how to build multiple counters using React and Redux. You can find the code here.
1. Setup
We will not use create-react-app, so we are going to setup the app from scratch.
Let’s create our app directory by mkdir multiple-counters && cd multiple-counters. Then, we will generate the package.json using npm init -y.
1.1 React, webpack, babel and webpack-dev-server
Now, we will setup react, webpack, babel, webpack-dev-server and some plugins by
npm install webpack webpack-cli --save-dev
npm install @babel/core babel-loader @babel/preset-env @babel/preset-react --save-dev
npm install react react-dom --save-dev
npm install html-webpack-plugin html-loader --save-dev
npm install webpack-dev-server --save-dev
We need to create .babelrc and its content is as follows:
{
  "presets": ["@babel/preset-env", "@babel/preset-react"]
}
And we need to create webpack.config.js and its content is as follows:
(We do not specify the entry and output as we will use the default one i.e. ./src/index.js for entry and ./dist/main.js for output.
const HtmlWebPackPlugin = require("html-webpack-plugin");
module.exports = {
  module: {
    rules: [
      {
        test: /\.js$/,
        exclude: /node_modules/,
        use: {
          loader: "babel-loader"
        }
      },
      {
        test: "/\.html$/",
        use: [
          {
            loader: "html-loader"
          }
        ]
      }
    ]
  },
  plugins: [
    new HtmlWebPackPlugin({
      template: "./src/index.html",
      filename: "./index.html"
    })
  ]
};
Now, open up package.json to add the following scripts:
"scripts": {
    "start": "webpack-dev-server --open --mode development",
    "build": "webpack"
}
1.2 Redux
Also, let’s install redux in our app by npm install react-redux redux --save.
1.3 index.js and index.html
The default entry point (webpack 4) is src/index.js. So, Let’s create one by mkdir src && touch src/index.js. Besides, we need to create src/index.html and its content is:
<!DOCTYPE html>
<html lang="en">
<head>
    <meta charset="utf-8">
    <title>Counters</title>
</head>
<body>
    <div id="root">
    </div>
</body>
</html>
1.4 App Structure
counters
--src
----js
--------actions
--------components
--------store
--package.json
--package-lock.json
--.babelrc
--webpack.config.js
--node_modules
Let’s create other required directories by mkdir -p src/js/{actions,components,store}
You can run npm run start, then while building this app, the browser will be reloaded automatically.
2. Mock up (list the state and actions for each component)
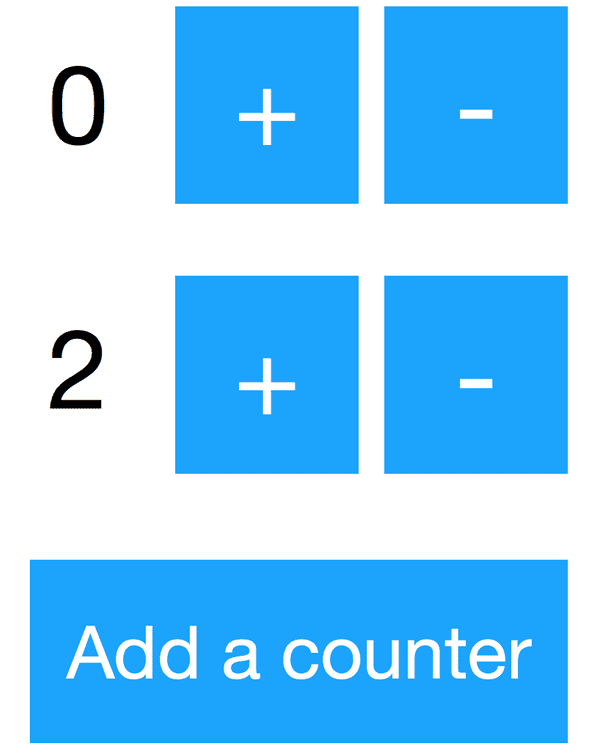
From the mock-up, the first component is CounterList, which contains many Counter. So, the second component is Counter. The third component is AddButton.
For CounterList, it will hold a list of Counter, so its state will be counters. Also, there are two actions, one is to increment a counter and the other one is to decrement a counter.
For AddButton, it has no state and its action is to create a counter.
3. Action Creators
After listing out the actions, we will create the corresponding action creators in src/js/actions/counters.js.
// ./src/js/actions/counters.js
export const increment = id => ({
  type: "INCREMENT",
  id
});

export const decrement = id => ({
  type: "DECREMENT",
  id
});

export const add_counter = () => ({
  type: "ADD_COUNTER"
});
4. Reducers and the store
A reducer is a pure function which takes previous state and action as parameters and then return the next state.
For action ADD_COUNTER, the reducer simply creates a new counter with a new id and zero count and append it to the list of counters.
For action INCREMENT, the reducer finds the right counter by id and increment the count by one.
For action DECREMENT, the reducer finds the right counter by id and decrement the count by one.
Finally, we create the store using the reducer counters.
// ./src/js/store/index.js
import { createStore } from 'redux';

const change_counter = (state = {}, action) => {
  switch (action.type) {
    case "INCREMENT":
      if (state.id !== action.id) {
        return state;
      }
      return {
        ...state,
        count: state.count + 1
      };
    case "DECREMENT":
      if (state.id !== action.id) {
        return state;
      }

      return {
        ...state,
        count: state.count - 1
      };
    default:
      return state;
  }
};

let nextId = 0;
const counters = (state = [], action) => {
  switch (action.type) {
    case "ADD_COUNTER":
      return [...state, {id: nextId++, count: 0}];
    case "INCREMENT":
      return state.map(counter => change_counter(counter, action));
    case "DECREMENT":
      return state.map(counter => change_counter(counter, action));
    default:
      return state;
  }
}

export default createStore(counters);
5. Components
There are three components. They are AddButton, Counter and CounterList.
5.1 AddButton
Since it has no state, we do not need to write mapStateToProps and mapDispatchToProps. We can simply inject the dispatch using connect().
// ./src/js/components/AddButton.js
import React from 'react';
import { add_counter } from '../actions/counters';
import { connect } from 'react-redux';

const AddButton = ({dispatch}) => (
  <button onClick={() => dispatch(add_counter())}>
    Add a counter
  </button>
);

export default connect()(AddButton);
5.2 Counter
This is a common React component, taking props from its parent.
// ./src/js/components/Counter.js
import React, { Component } from 'react';

class Counter extends Component {
  render() {
    return (
      <div>
        <span>{this.props.value}</span>
        <button onClick={() => this.props.onIncrement()}>
          +
        </button>
        <button onClick={() => this.props.onDecrement()}>
          -
        </button>
      </div>
    );
  }
}

export default Counter;
5.3 CounterList
Note that the naming should be consistent. We use counters, onIncrement and onDecrement in mapStateToProps and mapDispatchToProps, we should use them in defining CounterList too.
// ./src/js/components/CounterList.js
import React from 'react';
import { connect } from 'react-redux';
import { increment, decrement } from '../actions/counters';
import Counter from './Counter';

const CounterList = ({
  counters,
  onIncrement,
  onDecrement
}) => (
  <ul>
    {counters.map(counter =>
      <Counter
        key={counter.id}
        value={counter.count}
        onIncrement={() => onIncrement(counter.id)}
        onDecrement={() => onDecrement(counter.id)}
      />
    )}
  </ul>
);

const mapStateToProps = state => {
  return {
    counters: state
  };
};

const mapDispatchToProps = (dispatch) => {
  return {
    onIncrement: id => dispatch(increment(id)),
    onDecrement: id => dispatch(decrement(id))
  };
};

export default connect(
  mapStateToProps,
  mapDispatchToProps
)(CounterList);
6. Bring everything together
The Provider exposes the store on the context so App, its children and grandchildren can access store.
// ./src/index.js
import React from 'react';
import ReactDOM from 'react-dom';
import CounterList from './js/components/CounterList';
import AddButton from './js/components/AddButton';
import store from './js/store/index';
import { Provider } from 'react-redux';

const App = () => (
  <div>
    <CounterList />
    <AddButton />
  </div>
);

ReactDOM.render(
  <Provider store={store}>
    <App />
  </Provider>,
  document.getElementById('root')
);
Written by Danny Siu who lives in Hong Kong. You should follow him on Twitter

